Fresh Milled Flour Sourdough Tortillas
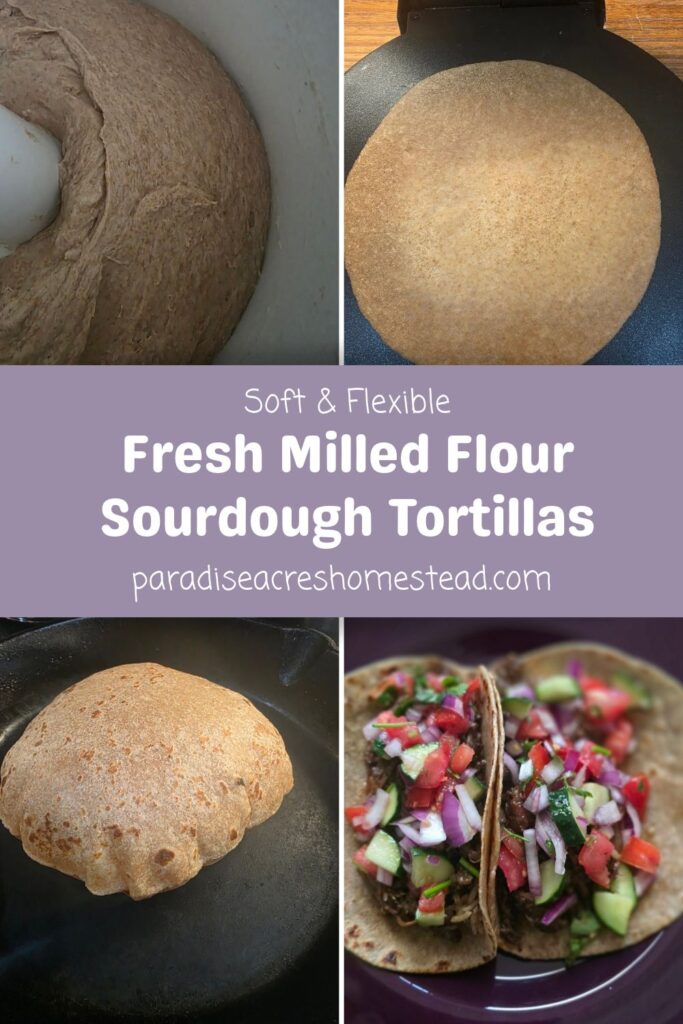
Taco night is a favorite at my house, and these fresh milled flour sourdough tortillas are soft, flexible, and sturdy enough to hold all your favorite taco fillings without falling apart. Made with freshly milled whole wheat, sourdough starter, and a handful of simple ingredients, they are a delicious homemade alternative to store-bought tortillas!
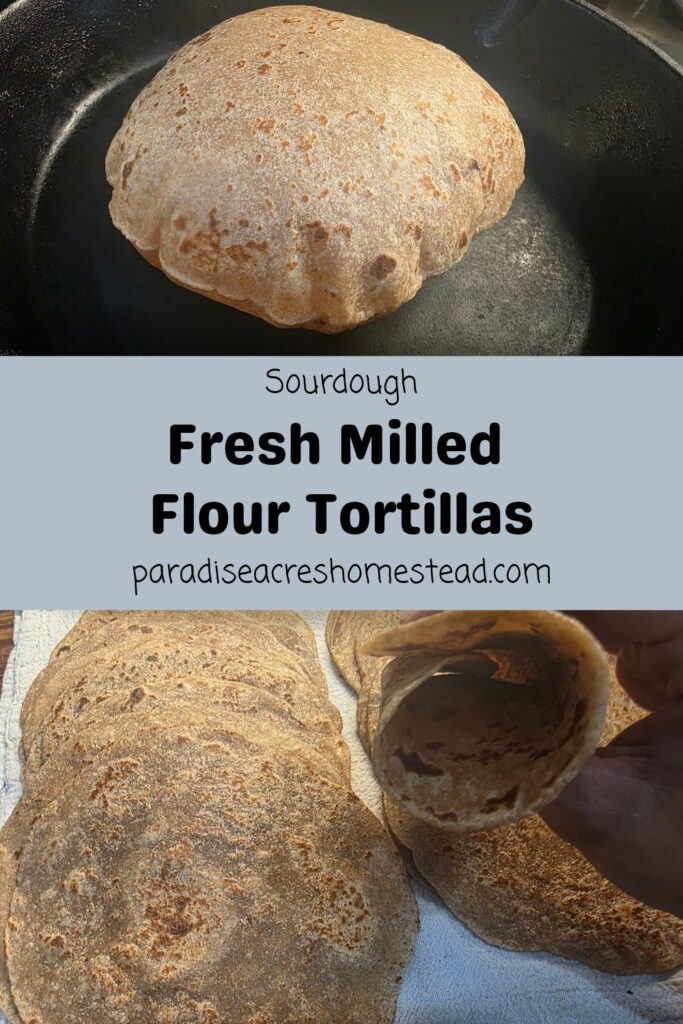
After many rounds of testing, I’ve landed on a recipe that makes tortillas with wonderful flavor, a tender texture, and those beautiful bubbles that form as they cook on a hot cast iron skillet. They’re perfect for taco night, quesadillas, wraps, and a favorite for my kids – PBJ wraps! My Blueberry Lavender Jam is one of their favorite flavors.
The best part? You don’t need to plan a long fermentation or wait overnight. These tortillas come together in a relatively short amount of time, making them practical enough for an ordinary weeknight dinner.
Jump to Recipe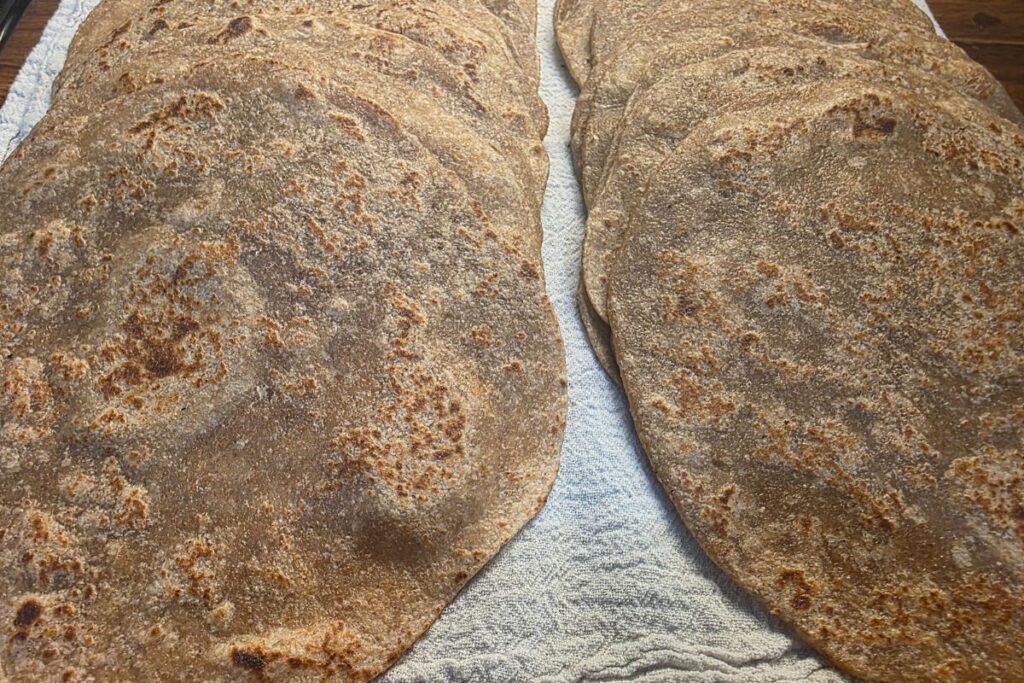
This post contains affiliate links, which means I make a small commission at no extra cost to you. As an Amazon Associate I earn from qualifying purchases. Please read our Disclosure Policy.
Why You’ll Love These Fresh Milled Flour Sourdough Tortillas
- Fresh milled whole grains. I love a blend of hard white wheat, hard red wheat, and a little khorasan for a flavorful, hearty tortilla.
- A great way to use sourdough starter. The starter adds to the flavor and makes this a wonderful recipe for using up some of your starter.
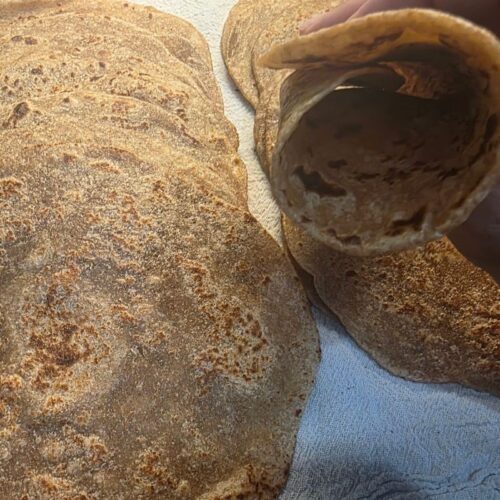
- Soft and flexible. These tortillas bend, fold, and roll without cracking or falling apart.
- Simple ingredients. No preservatives, artificial ingredients, or complicated techniques.
- No overnight fermentation required. A few rests allow the dough to hydrate and relax without the need for a long ferment.
- Perfect for more than tacos. Use them for quesadillas, breakfast wraps, burritos, or a quick snack with peanut butter and jam.
Fresh Milled Flour Sourdough Tortilla Ingredients
- Fresh milled flour – I typically use a combination of hard white wheat, hard red wheat, and a little khorasan. Hard white wheat provides a mild flavor, hard red adds a heartier whole-wheat flavor, and khorasan brings its own distinctive, slightly buttery taste. You can adjust the blend to suit your preferences.
- Sourdough starter – Fed or discard. Just know that the starter’s hydration and consistency can affect the final dough slightly.
- Hot water – Hot water helps hydrate the freshly milled flour. The dough will feel quite sticky, which is intentional!
- Oil – Oil helps create a tender tortilla that stays flexible instead of becoming dry and brittle. I prefer avocado oil or extra virgin olive oil.
- Salt – Essential for bringing out the flavor of the whole grains.
- Baking powder – A small amount helps encourage a lighter texture and contributes to the puffing as the tortillas cook.
Equipment/Ingredients I Use
One of my favorite places to stock our pantry is Azure Standard. Since I focus on whole foods and avoiding processed ingredients, buying many of our staples in bulk helps us save money while keeping high-quality ingredients on hand. If you’ve never ordered from Azure Standard before, you can shop through my link here.
How to Make Fresh Milled Flour Sourdough Tortillas
1. Mill your flour
Mill your wheat berries fresh. For this recipe, I typically use hard white wheat, hard red wheat, and a little khorasan, but feel free to experiment with the proportions.
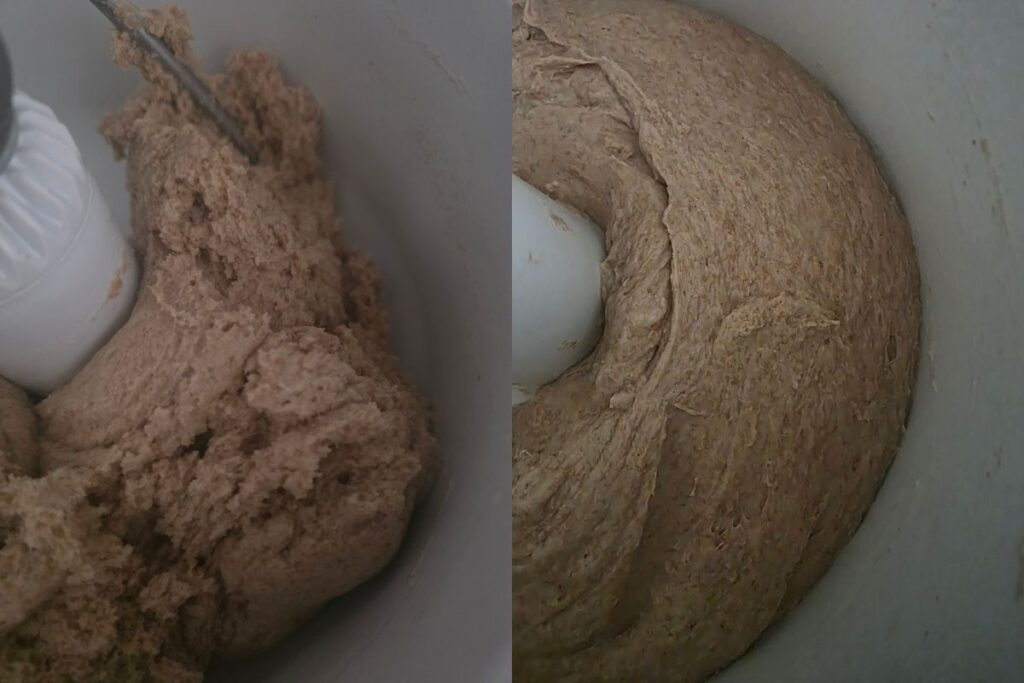
The goal is a soft, hydrated dough—not a dry dough that’s easy to handle but produces tough tortillas.
2. Mix the dough
In the bowl of a stand mixer, combine the fresh milled flour, hot water, sourdough starter, oil, salt, and baking powder.
Mix until the ingredients are thoroughly combined and no dry flour remains.
The dough will be sticky. Resist the urge to add a bunch of extra flour! This softer dough is part of what helps the finished tortillas stay tender and flexible.
Allow dough to rest 10-20 minutes, this gives the freshly milled flour time to absorb the water.
3. Knead and rest
Knead the dough in your stand mixer until it comes together and becomes more cohesive.
Cover the bowl and let the dough rest for 30–45 minutes. This rest allows the dough to relax, making it easier to portion and press.
4. Divide into dough balls
Divide the dough into approximately 60-gram portions and shape them into balls. You can adjust the size for smaller or larger tortillas.
This is where the sticky consistency becomes especially noticeable. I keep a small bowl of water nearby and lightly wet my fingers between shaping each ball. This helps keep the dough from sticking to my hands without adding extra flour to the recipe.
Cover the dough balls and let them rest for another 20–30 minutes.
Don’t skip this rest! Relaxed dough is much easier to press thinly without shrinking back.
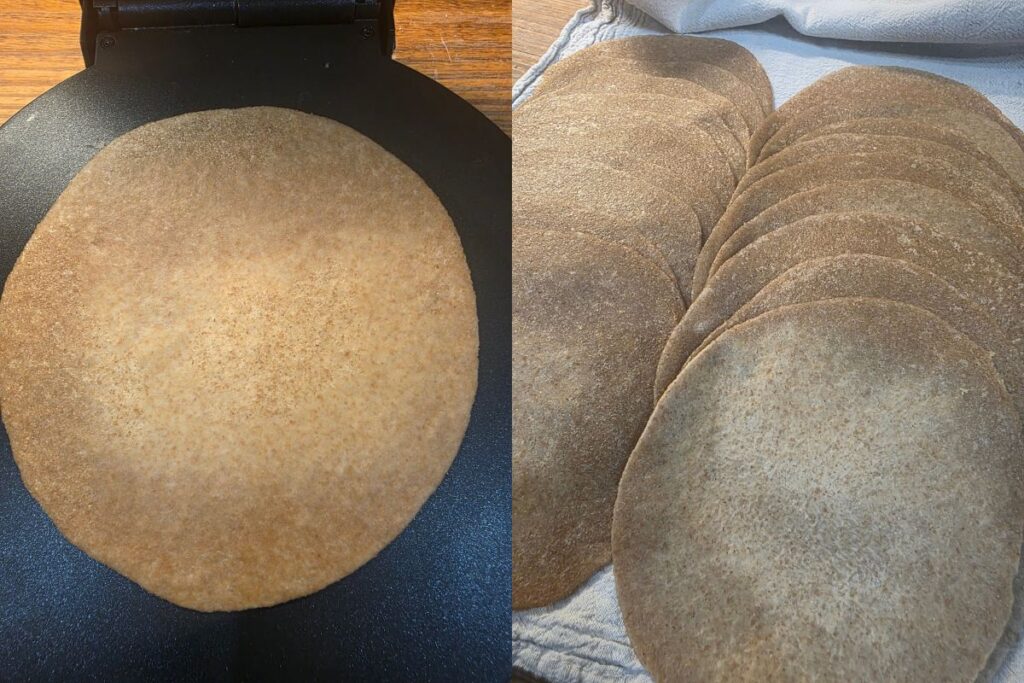
I love my CucinaPro tortilla maker to press the tortillas.
5. Press the tortillas
Preheat your electric tortilla press according to the manufacturer’s instructions. I use the CucinaPro and adjust to about one fourth between the min/max setting.
Place each dough ball in the press and press it just until flat. You want a thin, even tortilla without pressing it so aggressively that it becomes paper-thin. Five – eight seconds with gentle pressure is what works for me.
If your dough sticks to your hands, lightly wet your fingers again. Avoid adding too much extra flour, as that can change the texture of the finished tortillas.
Move pressed tortillas to a cotton cloth to finish cooking on a cast iron skillet.
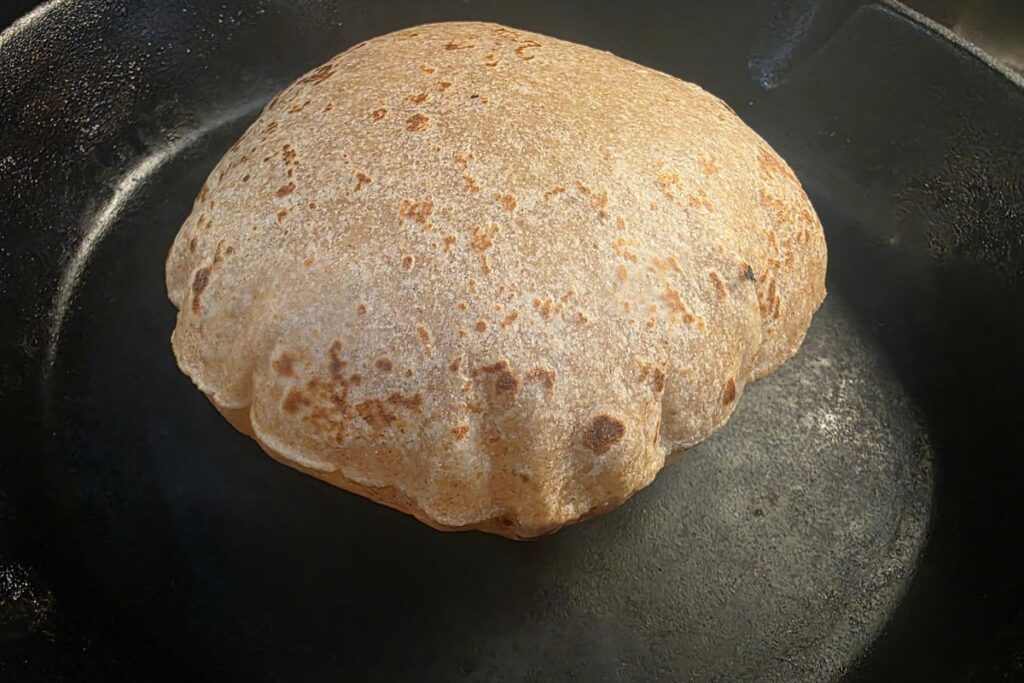
Consistent thickness, adequate hydration, relaxed dough, and the right skillet temperature are important factors in getting tortillas to puff.
6. Cook on a hot cast iron skillet
Heat a cast iron skillet over medium-high heat. It should be hot enough that the tortilla begins cooking promptly, but not so hot that it scorches before the inside has a chance to steam.
Place a pressed tortilla in the dry skillet and cook for approximately 20–30 seconds on the first side. Flip and cook the second side for another 20–30 seconds.
Flip once more and watch for bubbles to form. Some tortillas may puff dramatically, while others may develop smaller bubbles or only puff partially. That’s perfectly normal!
Adjust the heat as needed. If the tortillas brown too quickly before they have a chance to puff, lower the temperature slightly. If they remain pale and dry out before cooking through, increase the heat.
7. Keep the tortillas covered
As each tortilla finishes cooking, stack it with the others inside a clean kitchen towel or a covered container.
Keeping the tortillas covered traps steam and helps them soften as they cool. This step makes a big difference in their flexibility!
Let them cool slightly before serving, or bring the whole stack straight to the table for taco night.
Tips for Soft, Flexible Tortillas That Puff
Don’t add extra flour just because the dough is sticky
This dough is naturally sticky, especially when you’re working with freshly milled whole grains. I find that lightly wetting my fingers between shaping the dough balls is much easier than trying to work more flour into the dough.
The goal is a soft, hydrated dough—not a dry dough that’s easy to handle but produces tough tortillas.
Give the dough time to rest
Fresh milled flour benefits from time to absorb moisture. The first rest hydrates the flour, while the other rests allow the dough balls to relax before shaping pressing.
If the tortillas keep shrinking back after pressing, give the dough balls another 5–10 minutes to rest.
Use a properly heated skillet
A hot skillet is one of the most important factors in getting tortillas to puff. The heat quickly cooks the surface, allowing steam to build inside the tortilla and separate its layers.
Too little heat can leave you with dry tortillas that never puff. Too much heat can brown the outside before the tortilla has time to inflate.
Don’t worry if every tortilla doesn’t puff
A beautiful balloon-like puff is fun to watch, but it’s not the only sign of a successful tortilla. Even tortillas that don’t puff completely can be soft, tender, and delicious.
Consistent thickness, adequate hydration, relaxed dough, and the right skillet temperature all help improve your results.
Keep the cooked tortillas covered
Don’t leave your finished tortillas sitting uncovered on the counter. They can lose moisture quickly and become stiff.
Stack them as they come off the skillet and keep them wrapped in a cotton cloth or covered container. The trapped steam helps keep the whole batch soft and pliable.
Keep fermentation short for this recipe
This recipe is designed to be made and cooked the same day, rather than long-fermented overnight. I’ve found that I get the results I want with a shorter rest, while the dough is still slightly warm from the mixing process.
If you choose to ferment the dough for longer, expect the flavor and potentially the texture to change. The recipe has been developed around a shorter preparation time.
How to Store Homemade Tortillas
At room temperature: Once cooled, store the fresh milled flour sourdough tortillas in an airtight container or bag for a short period. For best quality, use them within a day or two.
In the refrigerator: Store in an airtight container for up to about a week. Refrigeration can make whole-grain tortillas firmer, so reheat them before serving.
In the freezer: Separate the cooled tortillas with small pieces of parchment paper if needed, then store them in a freezer-safe bag or container. Freeze for up to 2–3 months for best quality.
How to Reheat Fresh Milled Sourdough Tortillas
For the best texture, warm tortillas in a hot, dry skillet for a few seconds on each side. Keep the warmed tortillas covered with a clean towel until ready to serve.
You can also warm a stack of tortillas wrapped in a cotton cloth in a steamer until heated through. Heat on low, and rotate the stack to avoid getting the bottom one too wet.
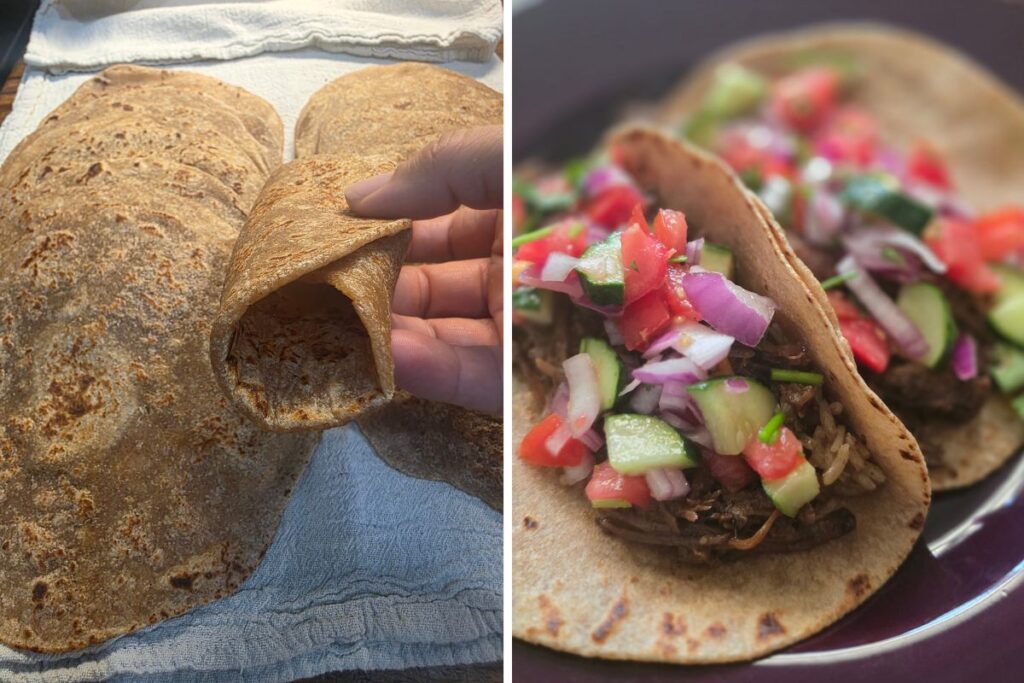
Ways to Use Fresh Milled Sourdough Tortillas
These tortillas are a staple for more than just taco night! Try them with:
- Ground beef or shredded chicken tacos
- Homemade breakfast burritos
- Quesadillas with cheese and leftover meat
- Fajitas with sautéed peppers and onions
- Lunch wraps
- Simple peanut butter and jam tortilla roll-ups. Blueberry Lavender is one of our favorite jam flavors!
Once you get used to having homemade tortillas on hand, store-bought ones are hard to go back to!
Frequently Asked Questions
Can I use sourdough discard?
Yes! This recipe is a great way to use sourdough discard. The starter contributes moisture and flavor, but the tortillas don’t rely on a long fermentation to be successful.
Do I have to use hard white, hard red, and khorasan wheat?
No. That’s simply my favorite blend. You can use different proportions of hard white and hard red wheat or include some khorasan. Keep the total flour weight at 375 grams for the most consistent results.
Why is my tortilla dough so sticky?
This recipe intentionally uses a high level of hydration to help produce soft, flexible tortillas. Freshly milled flour also continues absorbing water as it rests. Lightly wet your fingers when shaping the dough balls rather than automatically adding more flour.
Why aren’t my tortillas puffing?
Puffing depends on several factors, including even thickness, dough hydration, how relaxed the dough is, and skillet temperature. Make sure the skillet is properly heated and that the tortillas aren’t cooking too slowly or browning too quickly.
Not every tortilla will puff the same way, even when you’re using the same dough. Keep practicing your timing and heat, and look for a balance that cooks the tortillas quickly without scorching them.
Can I make the dough ahead of time?
This recipe is designed for a same-day process and hasn’t been developed around an overnight fermentation. For the most consistent results, follow the recommended resting times and cook the tortillas while the dough is still relatively fresh.
Final Thoughts
Fresh milled flour sourdough tortillas have become one of my favorite homemade staples. They’re simple, flavorful, and sturdy enough for a loaded taco while still staying soft and flexible.
And once you get the hang of working with the sticky dough and finding the right skillet temperature, they’re surprisingly easy to make!
If you try these tortillas, I’d love to hear how they turn out. Homemade taco night just might become your favorite night of the week, too.
Fresh Milled Flour Sourdough Tortillas
Equipment
- 1 tortilla press
- 1 cast iron skillet
Ingredients
- 375 grams fresh milled flour 3 cups
- 270 grams hot water 1 cup + 2 tbsp
- 100 g sourdough starter 1/2 cup
- 65 g oil 1/3 cup
- 8 g salt 1 1/2 tsp
- 4 g baking powder 1 tsp
Instructions
Mill your flour
- Mill your wheat berries fresh. For this recipe, I typically use hard white wheat, hard red wheat, and a little khorasan, but feel free to experiment with the proportions.
Mix the dough
- In the bowl of a stand mixer, combine the fresh milled flour, hot water, sourdough starter, oil, salt, and baking powder.
- Mix until the ingredients are thoroughly combined and no dry flour remains.
- The dough will be sticky. Resist the urge to add a bunch of extra flour! This softer dough is part of what helps the finished tortillas stay tender and flexible.
- Allow dough to rest 10-20 minutes, this gives the freshly milled flour time to absorb the water.
Knead and rest
- Knead the dough in your stand mixer until it comes together and becomes more cohesive.
- Cover the bowl and let the dough rest for 30–45 minutes. This rest allows the dough to relax, making it easier to portion and press.
Divide into dough balls
- Divide the dough into approximately 60-gram portions and shape them into balls. You can adjust the size for smaller or larger tortillas.
- This is where the sticky consistency becomes especially noticeable. I keep a small bowl of water nearby and lightly wet my fingers between shaping each ball. This helps keep the dough from sticking to my hands without adding extra flour to the recipe.
- Cover the dough balls and let them rest for another 20–30 minutes.
- Don’t skip this rest! Relaxed dough is much easier to press thinly without shrinking back.
Press the tortillas
- Preheat your electric tortilla press according to the manufacturer’s instructions. I use the CucinaPro and adjust to about one fourth between the min/max setting.
- Place each dough ball in the press and press it just until flat. You want a thin, even tortilla without pressing it so aggressively that it becomes paper-thin. Five – eight seconds with gentle pressure is what works for me.
- If your dough sticks to your hands, lightly wet your fingers again. Avoid adding too much extra flour, as that can change the texture of the finished tortillas.
- Move pressed tortillas to a cotton cloth to finish cooking on a cast iron skillet.
Cook on a hot cast iron skillet
- Heat a cast iron skillet over medium-high heat. It should be hot enough that the tortilla begins cooking promptly, but not so hot that it scorches before the inside has a chance to steam.
- Place a pressed tortilla in the dry skillet and cook for approximately 20–30 seconds on the first side. Flip and cook the second side for another 20–30 seconds.
- Flip once more and watch for bubbles to form. Some tortillas may puff dramatically, while others may develop smaller bubbles or only puff partially. That’s perfectly normal!
- Adjust the heat as needed. If the tortillas brown too quickly before they have a chance to puff, lower the temperature slightly. If they remain pale and dry out before cooking through, increase the heat.
Keep the tortillas covered
- As each tortilla finishes cooking, stack it with the others inside a clean kitchen towel or a covered container.
- Keeping the tortillas covered traps steam and helps them soften as they cool. This step makes a big difference in their flexibility!
- Let them cool slightly before serving, or bring the whole stack straight to the table for taco night.
Notes
Did You Make This Recipe?
I’d love to hear how it turned out! If you enjoyed this recipe, please leave a ⭐⭐⭐⭐⭐ rating and a comment below. Your reviews not only make my day, but they also help other home bakers find and trust my recipes.
Save this recipe for later on Pinterest so it’s easy to find next time. While you’re there, follow Paradise Acres Homestead for more fresh milled flour recipes, sourdough baking, and from-scratch homestead favorites.